Cryptocurrencies have become a popular investment option in recent years, and as the value of these digital assets continues to rise, it is essential to take precautions to protect them from theft and hacking. One of the most effective ways to secure your cryptocurrencies is by using a cold wallet. In this article, we will explore what a cold wallet is, How to Set Up and Use a Cold Wallet to keep your digital assets safe.
What is a Cold Wallet?
A cold wallet, also known as a hardware wallet, is a physical device that stores your private keys offline. Private keys are essential for accessing your cryptocurrencies and making transactions, so keeping them secure is crucial to protecting your digital assets from theft and hacking. A cold wallet is called “cold” because it is not connected to the internet, making it less vulnerable to online attacks.

How to Set Up a Cold Wallet
Setting up a cold wallet is a straightforward process that can be completed in a few simple steps. Here's how to set up a cold wallet:
Step 1: Choose a Cold Wallet
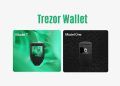
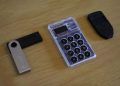
The first step in setting up a cold wallet is to choose the right device. There are several cold wallets available in the market, including Ledger Nano S, Trezor Model T, KeepKey, and BitBox02. Each cold wallet has its unique features, so do your research and choose the one that best suits your needs.
Step 2: Purchase the Cold Wallet
Once you have chosen the cold wallet you want, the next step is to purchase it. You can purchase a cold wallet from the manufacturer's website or from authorized resellers. Make sure to buy from a reputable source to avoid scams or fake products.
Step 3: Set Up the Cold Wallet
After purchasing the cold wallet, the next step is to set it up. Each cold wallet comes with a set of instructions on how to set it up, but the process is generally similar. Here are the general steps to set up a cold wallet:
- Connect the cold wallet to your computer using a USB cable
- Follow the on-screen instructions to create a new wallet
- Choose a strong PIN code
- Write down your recovery seed and keep it in a safe place
- Confirm your recovery seed
Step 4: Transfer Your Cryptocurrencies to the Cold Wallet
After setting up the cold wallet, the next step is to transfer your cryptocurrencies from your online wallet to the cold wallet. To do this, log in to your online wallet and follow the instructions to transfer your cryptocurrencies to the cold wallet's address.
How to Use a Cold Wallet

Using a cold wallet is straightforward, but it requires some extra steps compared to online wallets. Here's how to use a cold wallet:
Step 1: Connect the Cold Wallet to Your Computer
To use your cold wallet, you need to connect it to your computer using a USB cable. Make sure to connect the cold wallet to a secure computer that is not infected with malware or viruses.
Step 2: Enter Your PIN Code
After connecting the cold wallet to your computer, enter your PIN code to unlock the wallet. Make sure to choose a strong PIN code and avoid using common numbers like 1234 or 0000.
Step 3: Sign Transactions
To make a transaction using your cold wallet, you need to sign it using your private keys. The process of signing a transaction varies depending on the cold wallet you are using, but it generally involves confirming the transaction on the device's screen and entering your PIN code to sign it.
Step 4: Disconnect the Cold Wallet
After completing your transaction, disconnect the cold wallet from your computer and store it in a safe place. Keeping your cold wallet offline is essential to protecting your private keys from online attacks.


Conclusion
A cold wallet is an excellent tool for securing your cryptocurrencies offline. While it may require some extra steps compared to online wallets, the added security is worth the effort. By following the above steps, you can Set Up a Cold Wallet and use a cold wallet to keep your digital assets safe from theft and hacking.


